Wall Repair Made Easy: How To Patch Drywall:
This is a picture tutorial from a recent project Just Add Paint completed for a customer in Mechanicsburg, PA. When we arrived at the job, we were told that a vent had been removed by a previous contractor and never repaired. Our homeowner stated that she wanted to patch the drywall before we arrived, but was not sure how due to the size. While most people are familiar with the mesh screens that can be used to cover smaller areas (these work GREAT for holes caused by doorknobs), something this size presents a different kind of challenge and requires a few more steps.
Materials Needed to patch drywall:
- Drill
- Dremel tool or utility knife
- 1/4 sheet of drywall
- drywall screws
- 1×2″ wood for bracing
- mesh drywall tape
- drywall compound (spackle)
- 4″ or 6″ Putty knife
- Sanding block or sandpaper
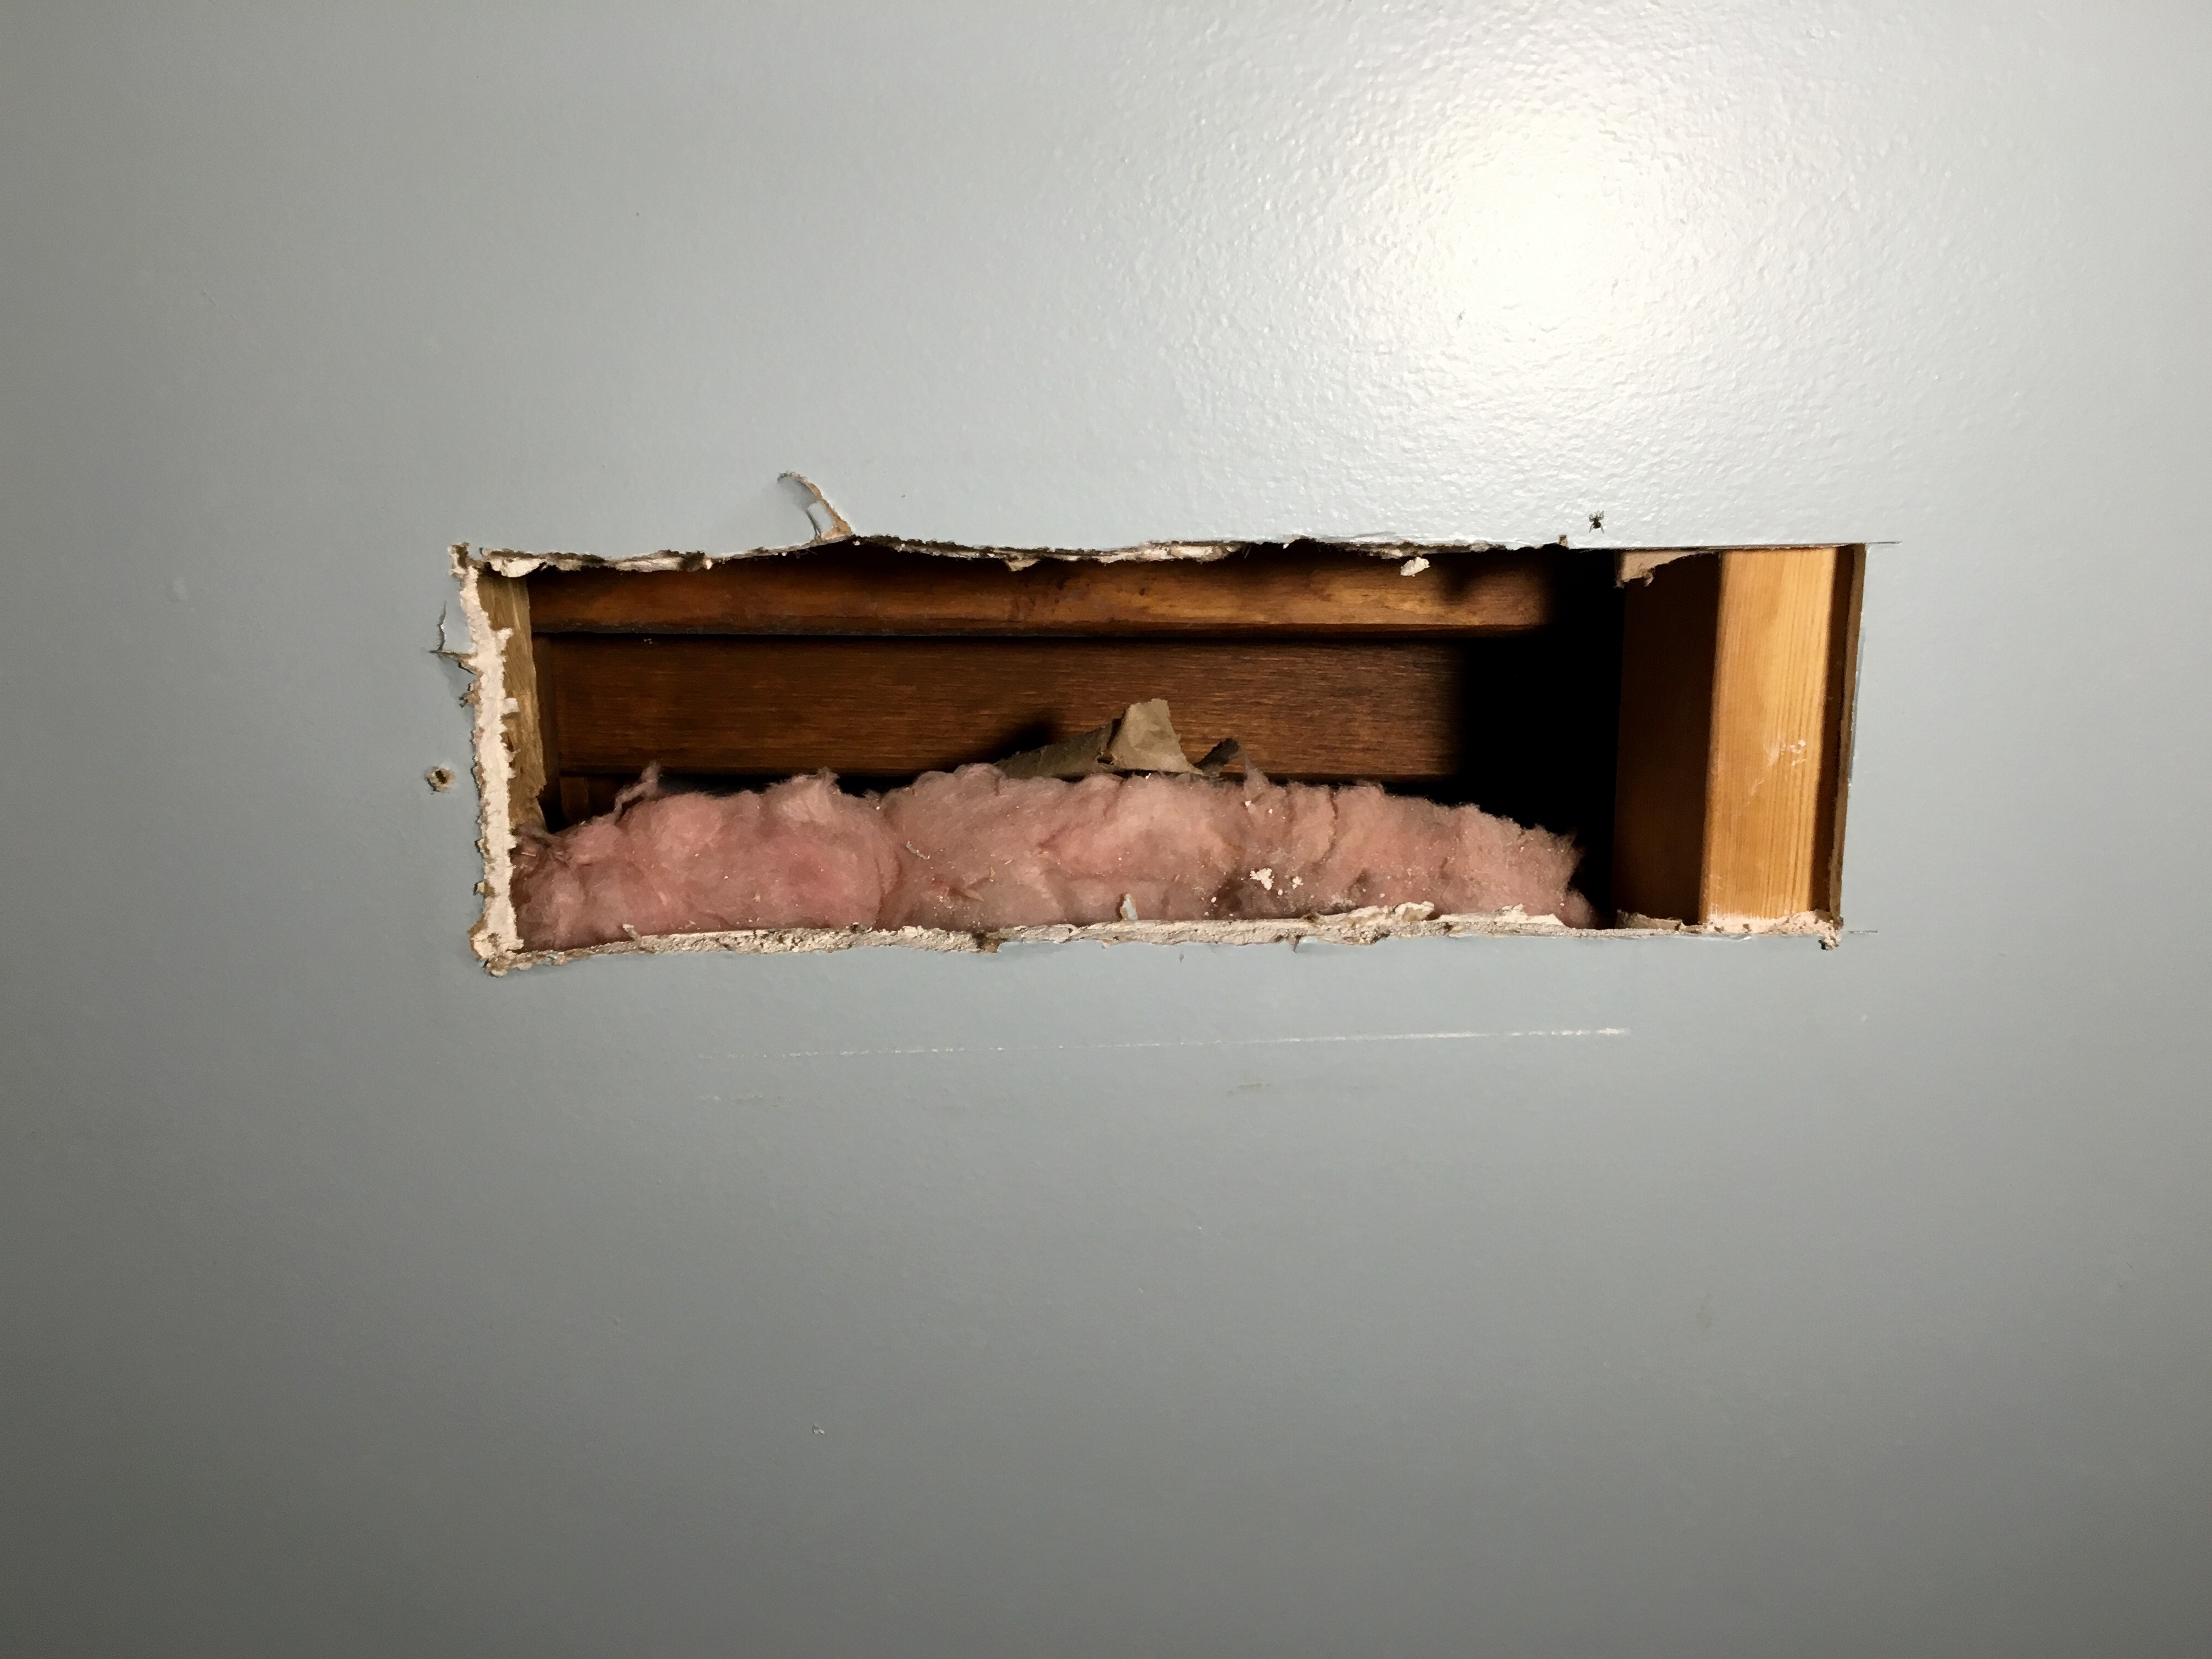
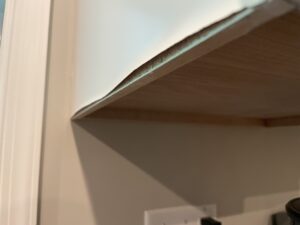
This is a “before” shot of the task at hand. The wall was cut roughly when the vent was originally installed, and the edges of the drywall needed to be cleaned up and made as straight and level as possible.
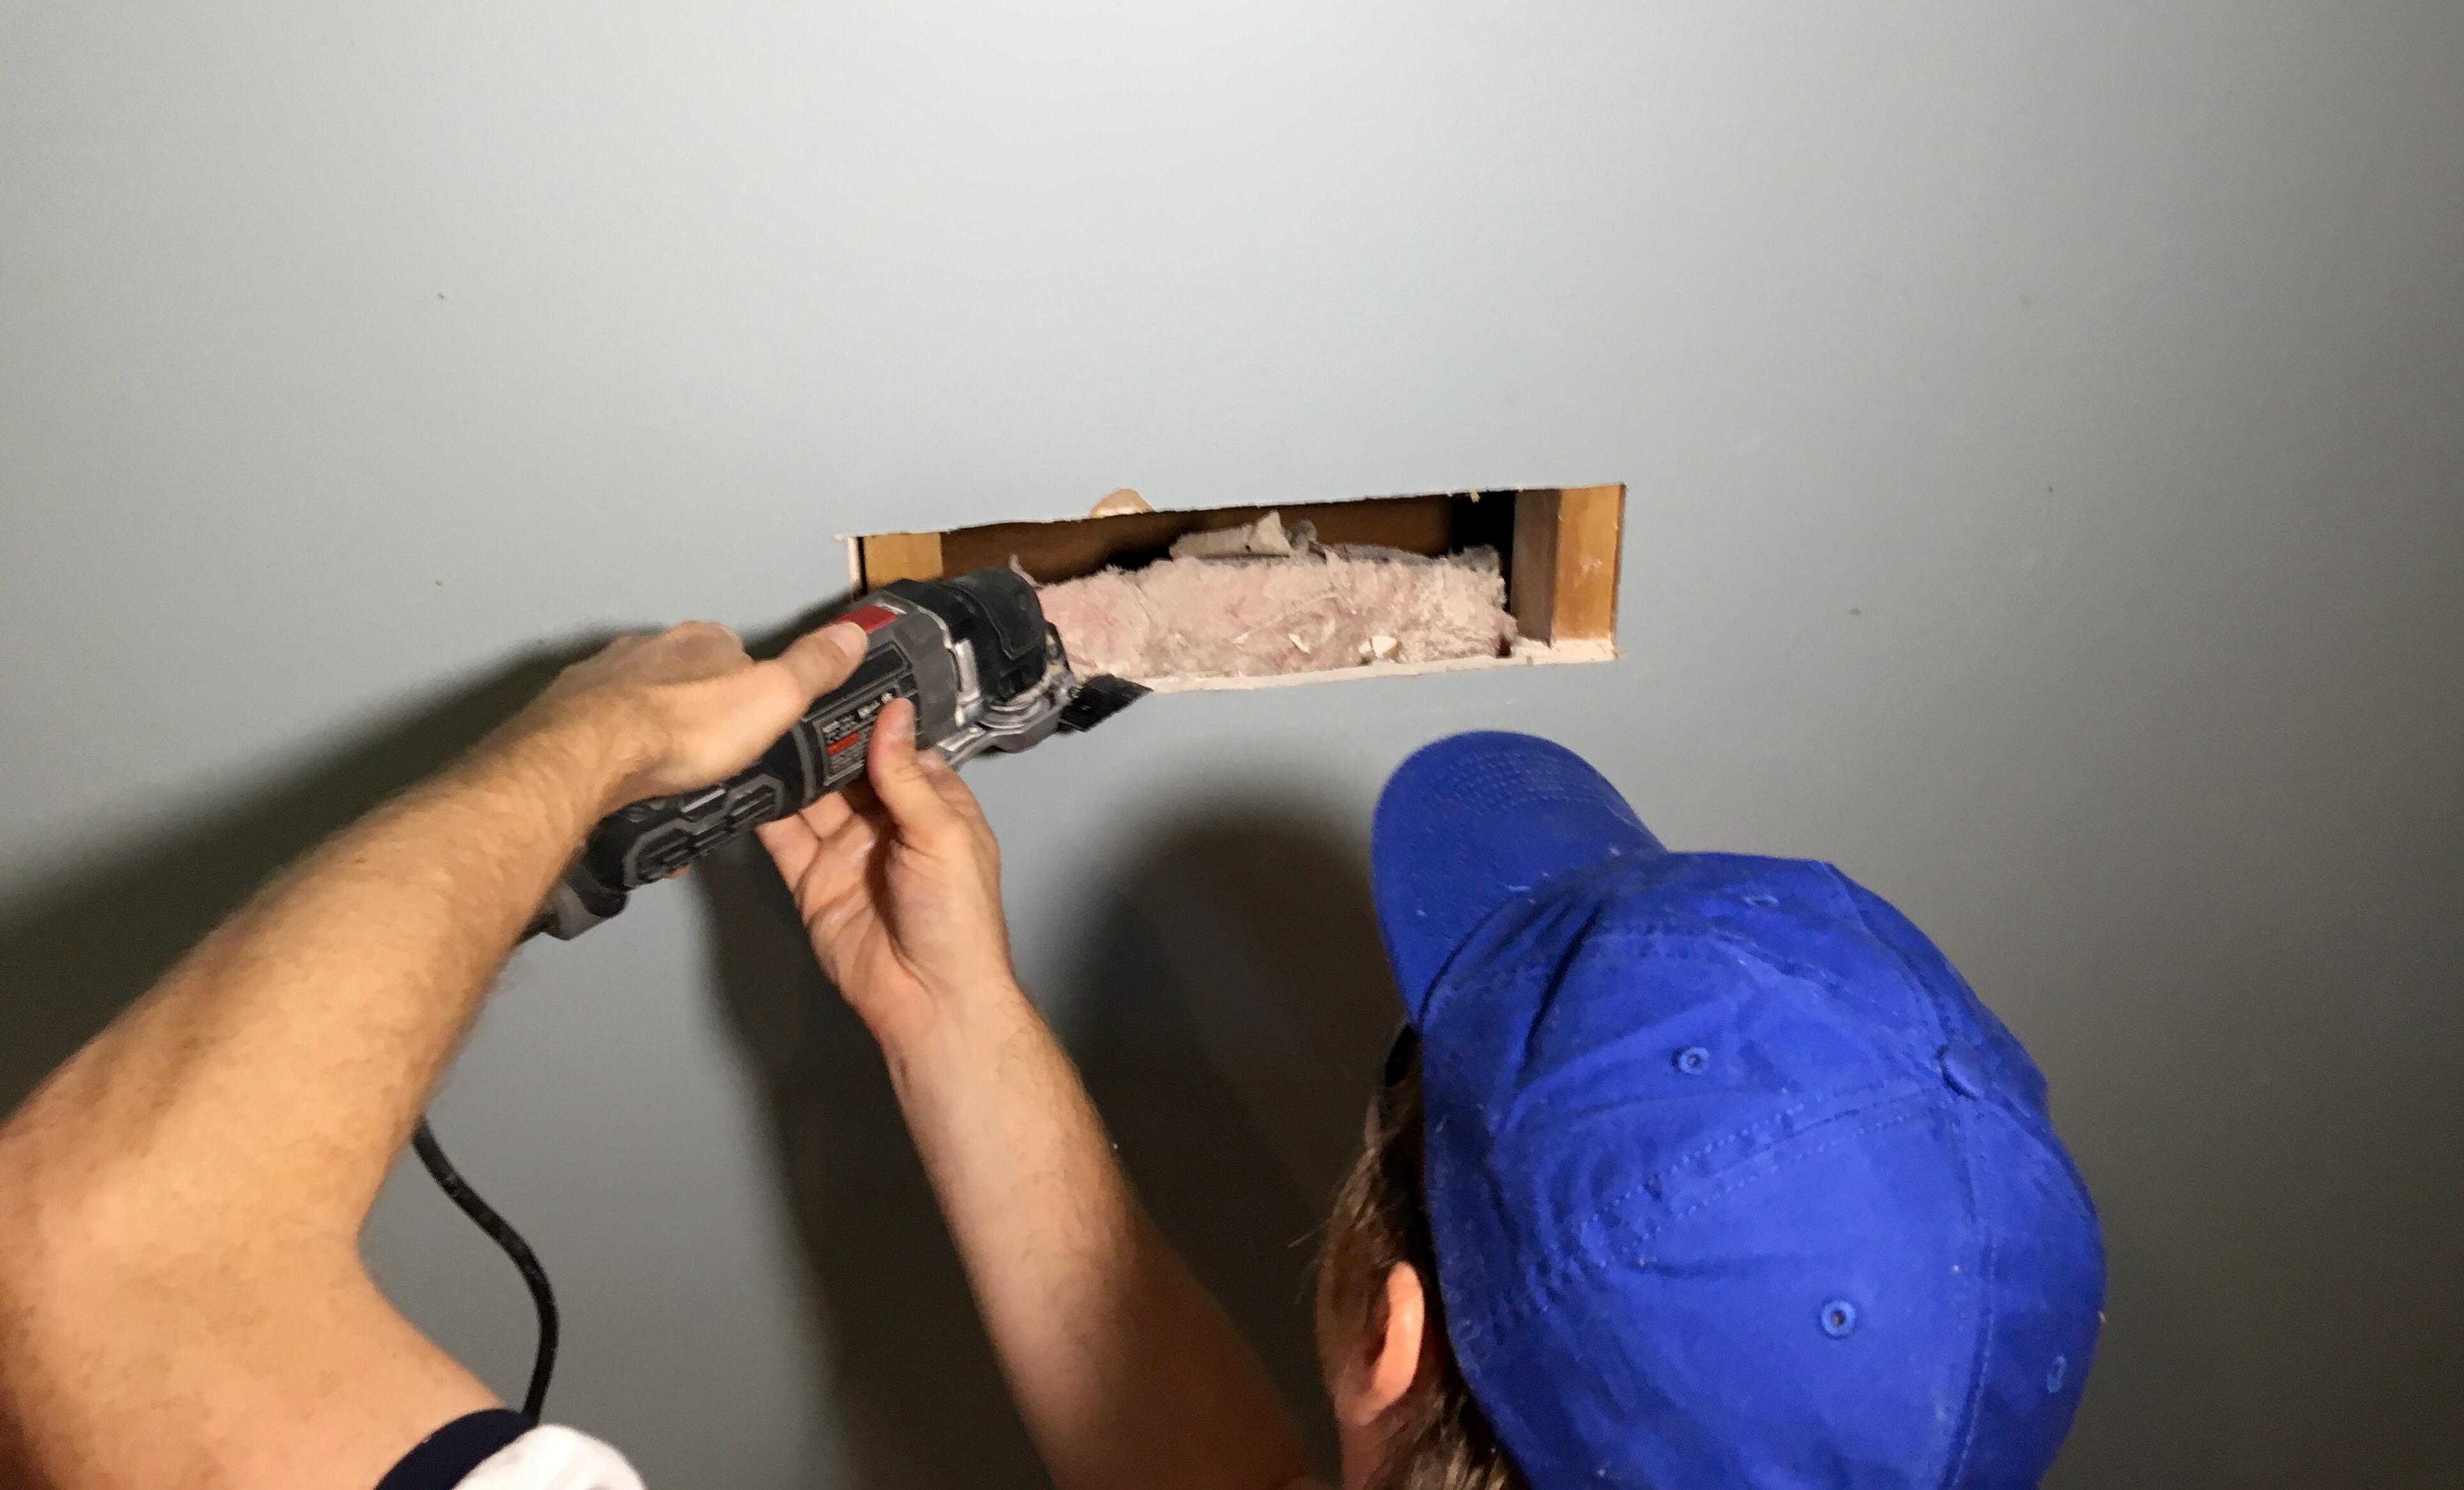
For this task, Just Add Paint used a dremel tool. This tool has a small, vibrating saw that was used to shave the edges down. If a dremel tool is not available, a utility knife can be used instead. We opted to cut the opening back to expose a stud on both sides of the patch so we had more support to screw our new drywall into.
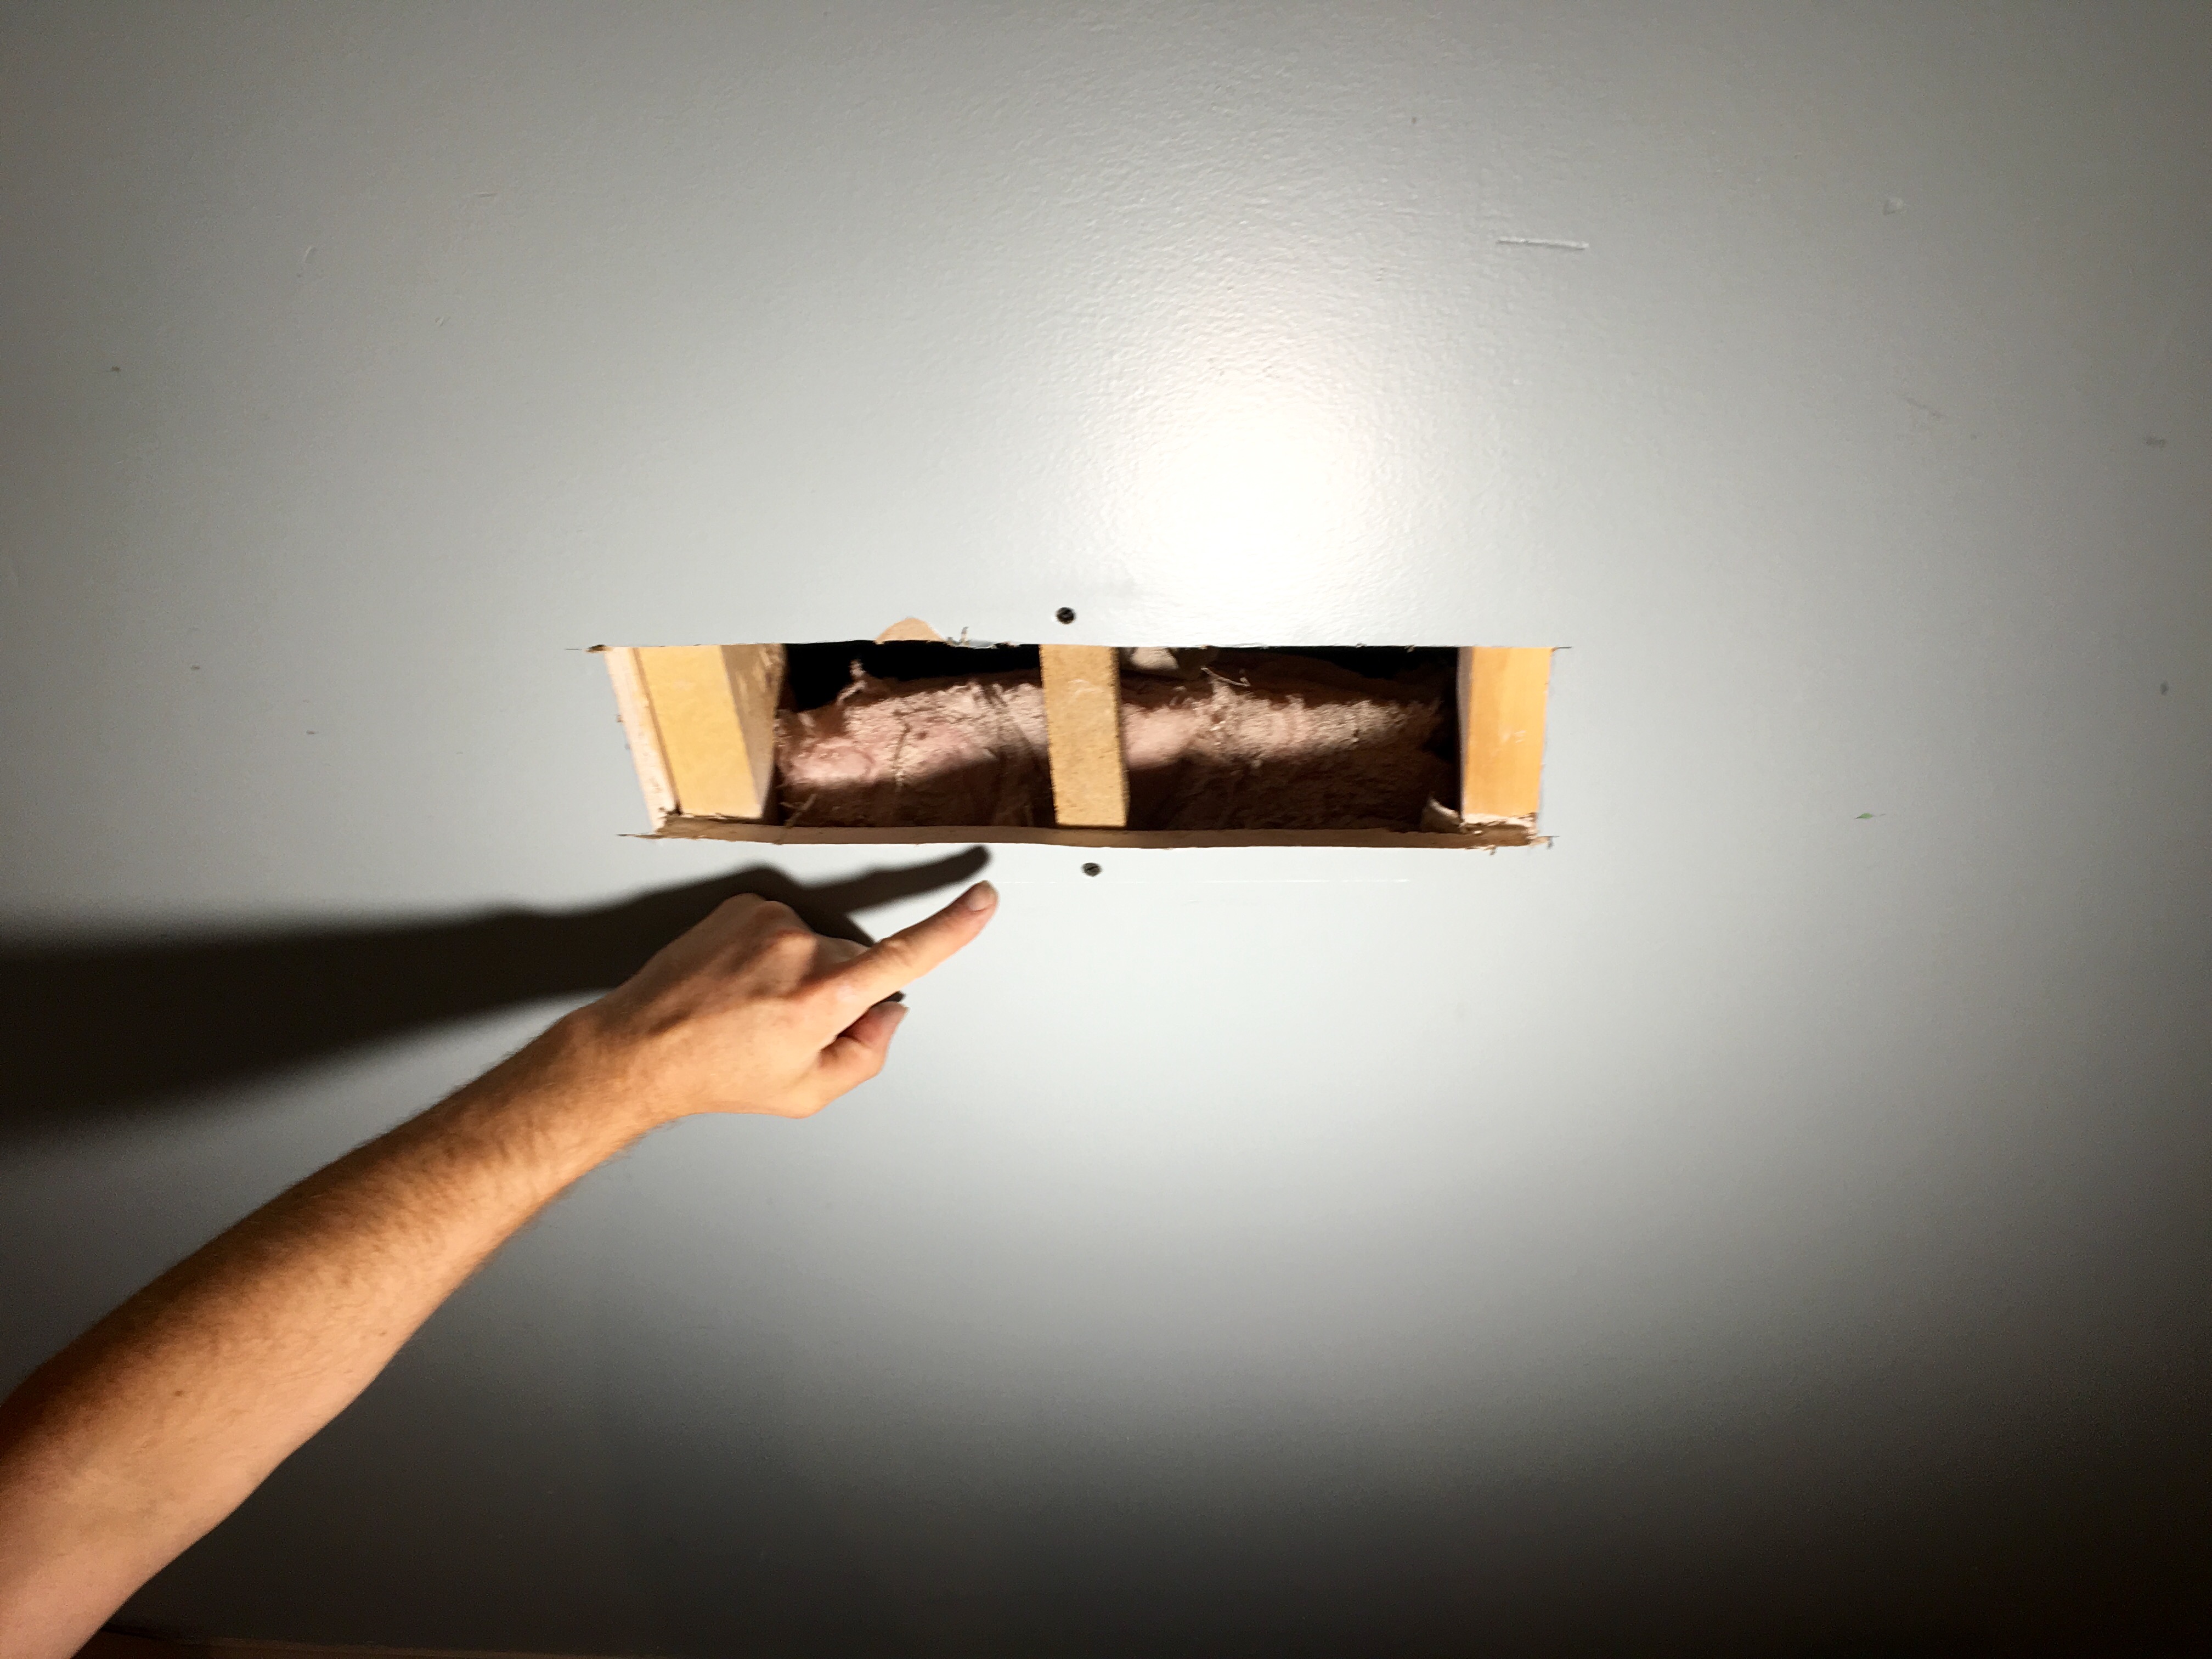
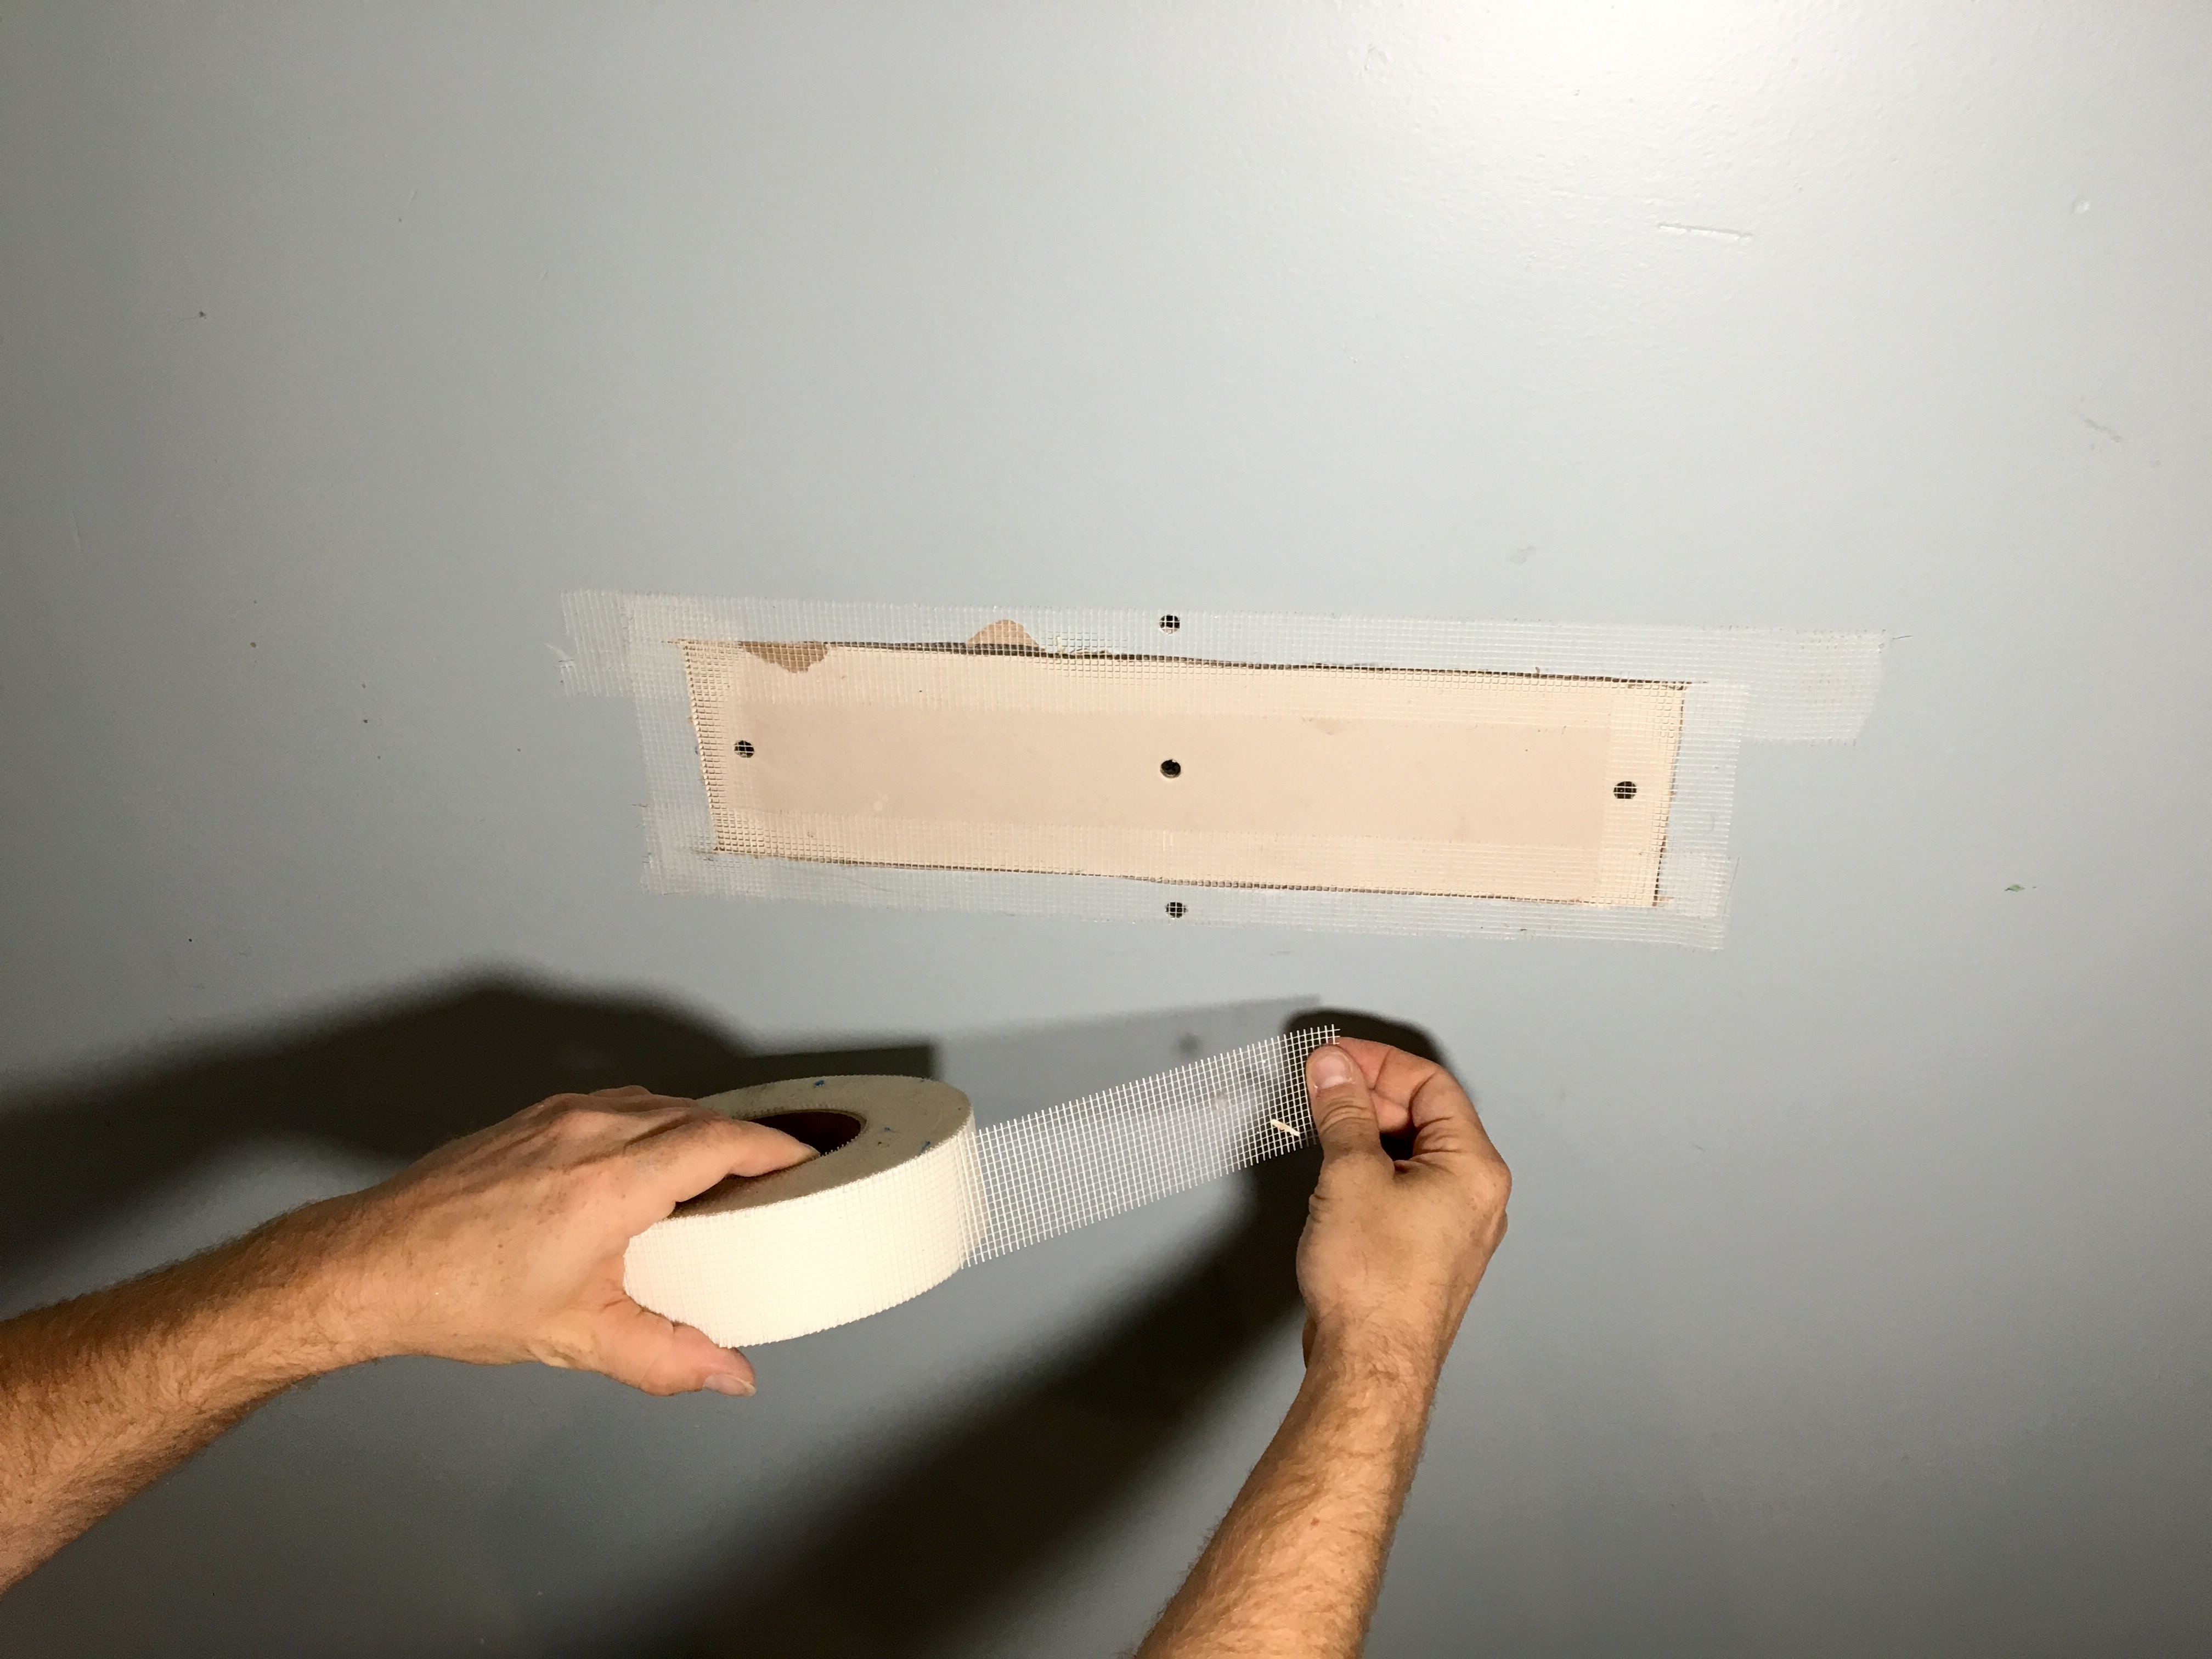
While the support on both sides was helpful, we wanted to make sure our new drywall would sit flush and not bow out. To prevent this, we installed a piece of 1×2″ wood in the between the studs. We drilled 2 drywall screws through the existing drywall into our new piece of wood to hold it in place.
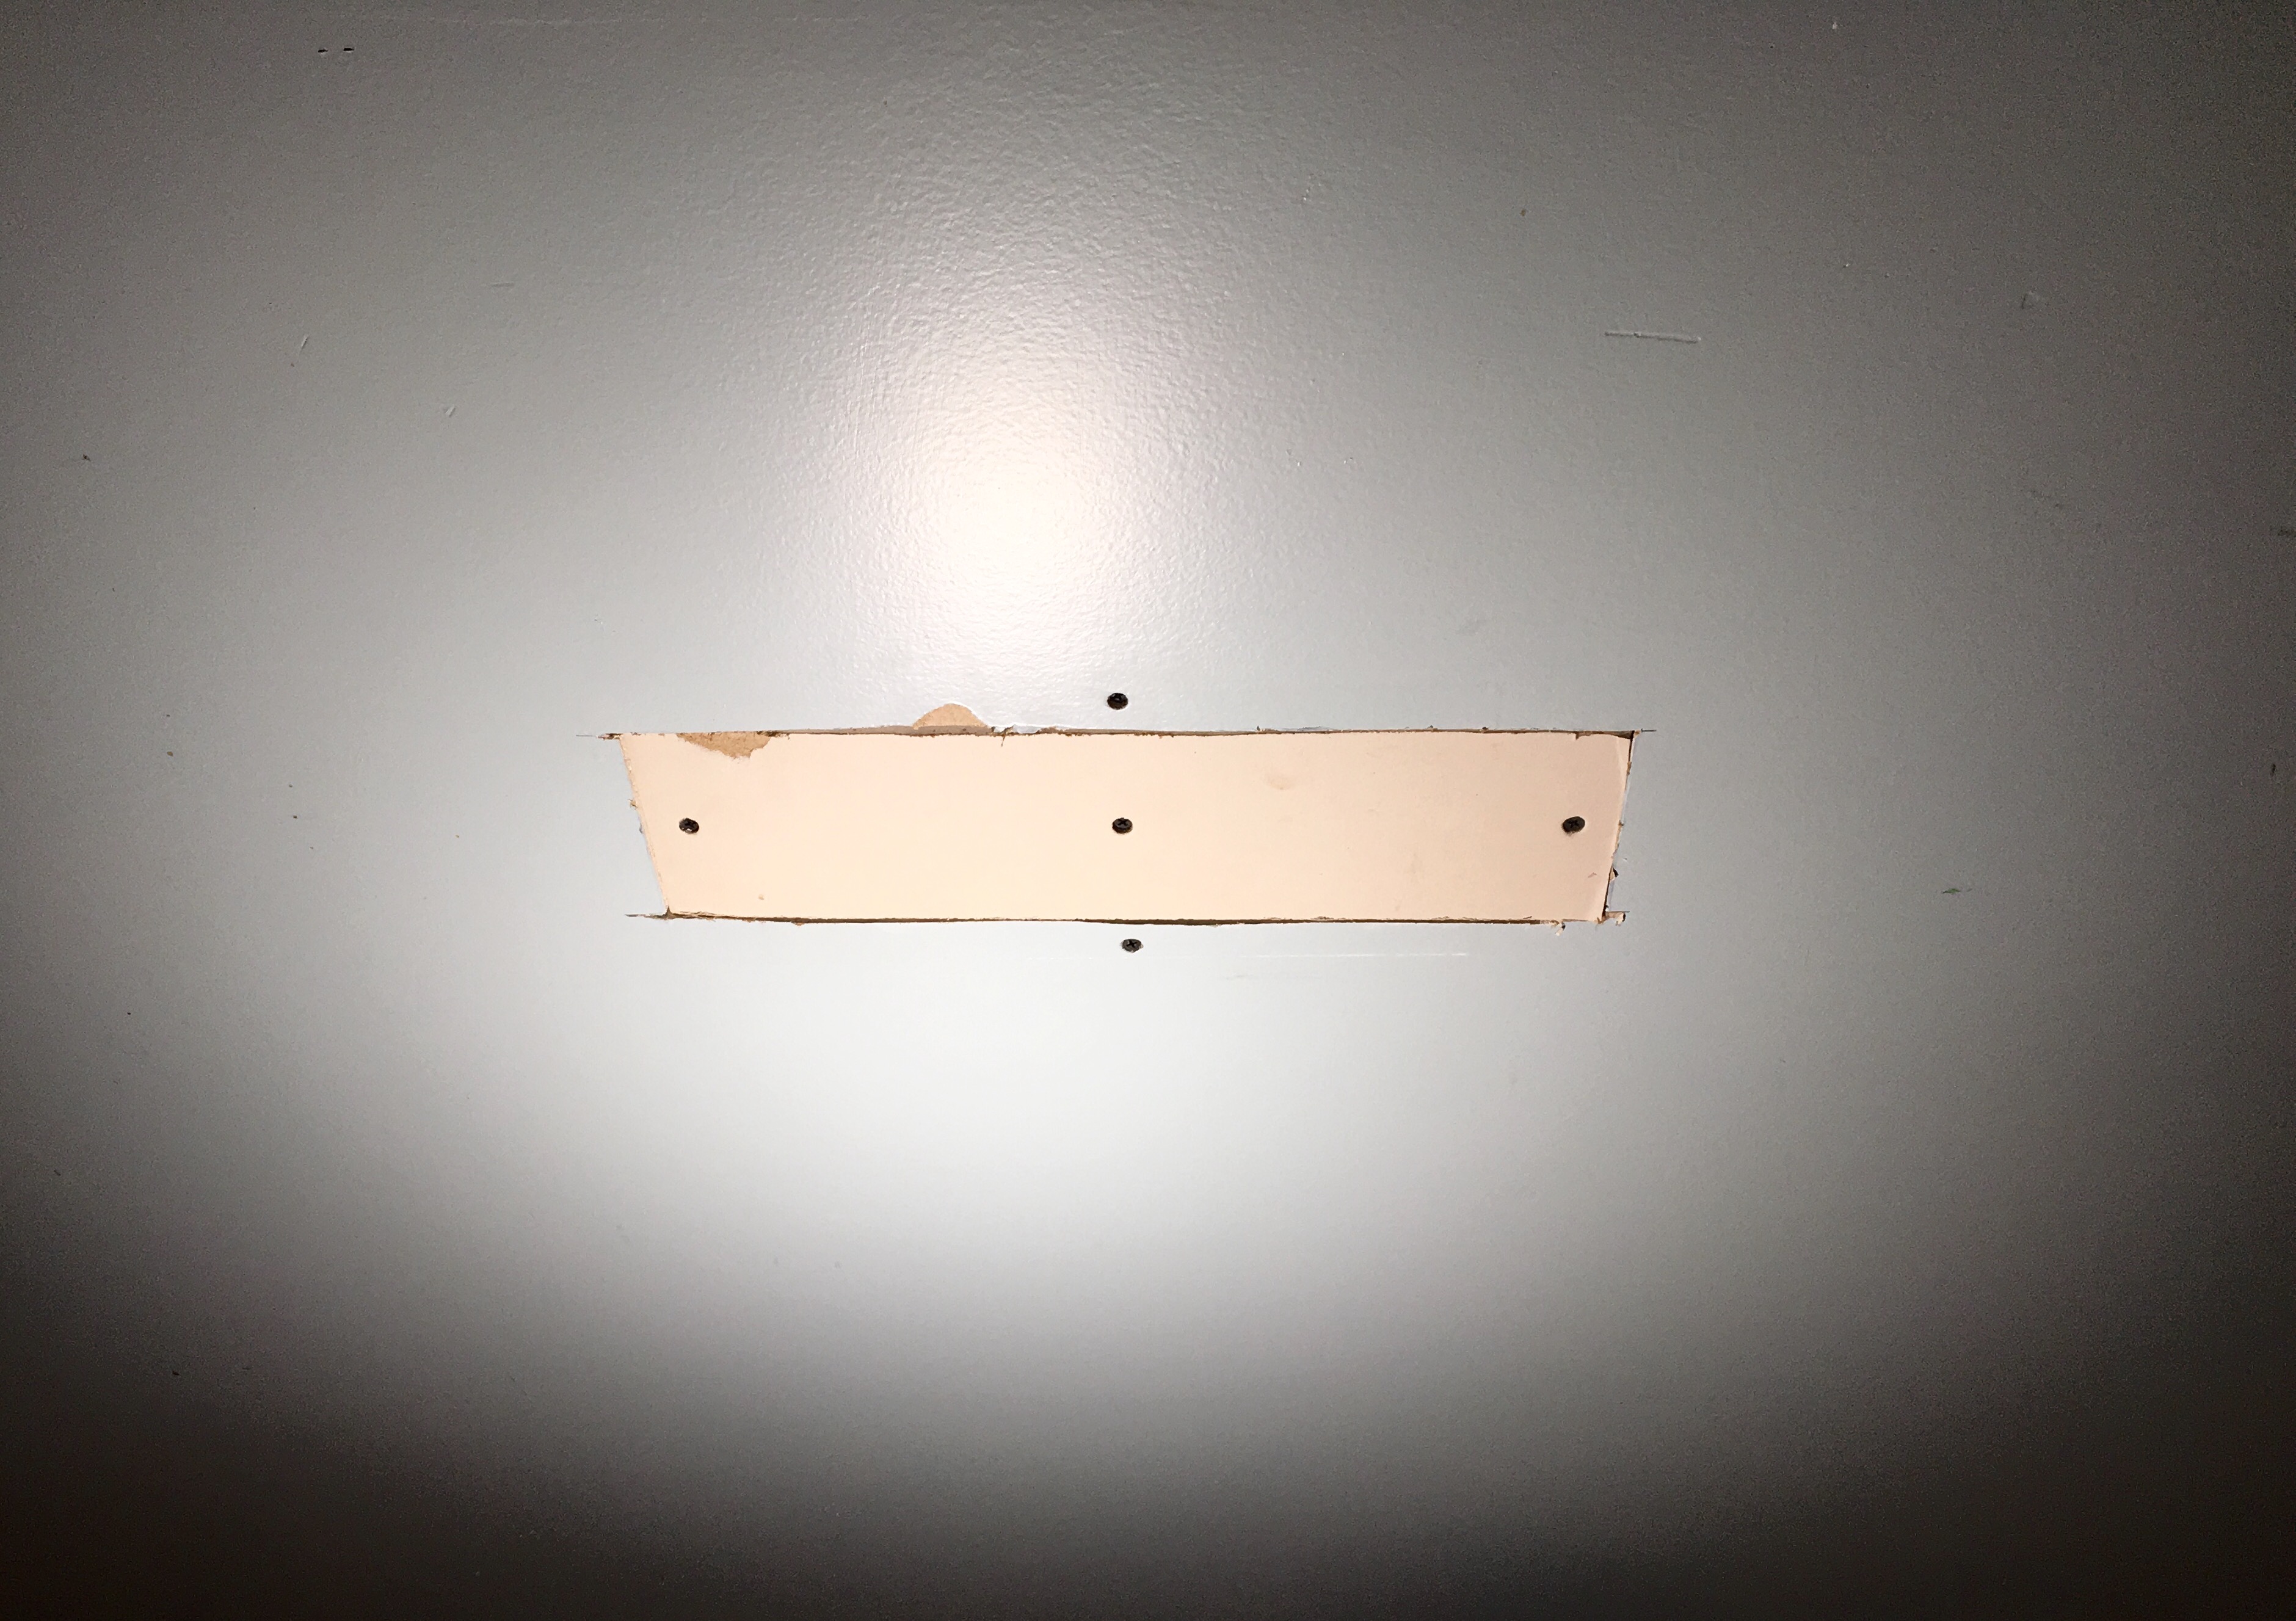
Next up we took a measurement and cut our replacement drywall to fit the hole. Remember it is better to cut this too big the first time and trim it back than have gaps that are too large. Larger gaps with too much drywall compound can crack out over time with humidity and temperature changes. We used 3 drywall screws for this step…
After our new drywall was screwed firmly into place, we applied mesh tape to cover the seams. Just Add Paint recommends this type of tape over standard drywall tape because is more “user friendly”. Mesh tape is self adhesive, does not fold or wrinkle easily, and prevents air bubbles from forming on the underside of the tape.
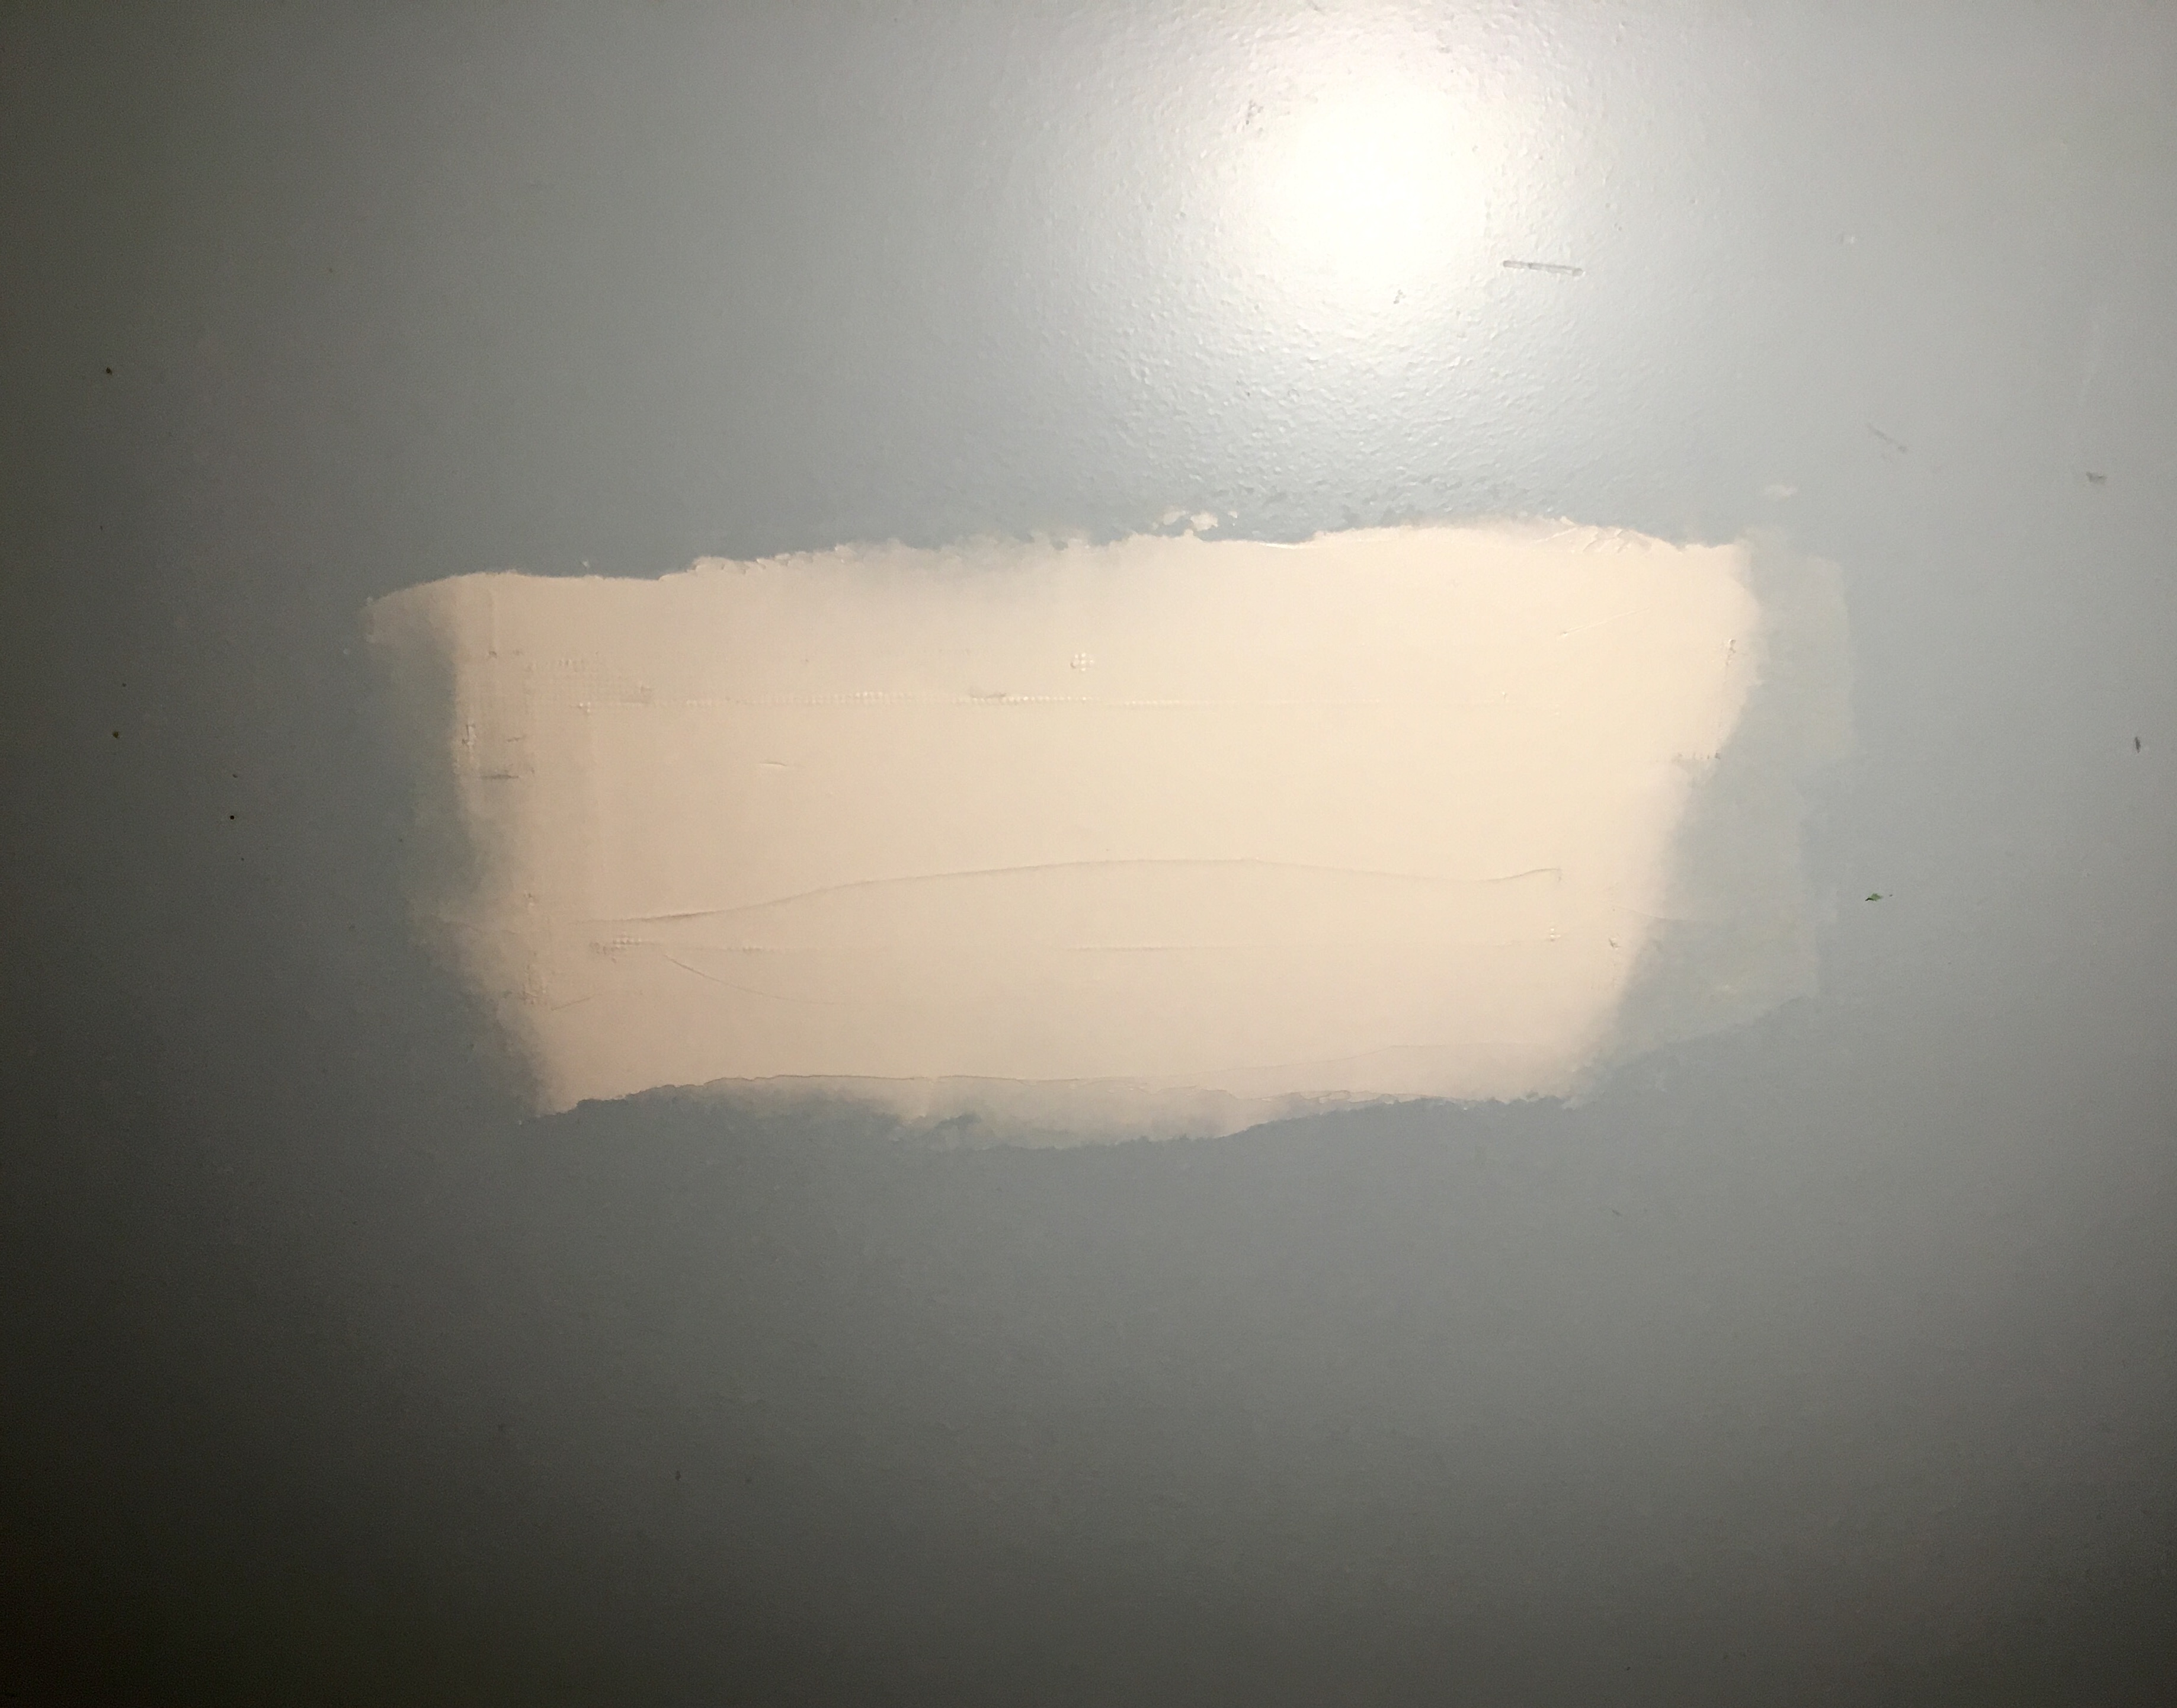
Finally we used a 4″ putty knife to spread drywall compound over our drywall patch. We used enough compound to completely cover the patch, and smoothed off the edges to prevent unnecessary sanding. Once dry, we applied a second coat and feathered the edges out a little further so the patch would be less noticeable on the finished, painted wall.
From this point we are a quick sand, prime, and paint away from the finished product! I would encourage readers to try this one at home – the difficulty level and cost are relatively low, and a small drywall patch can be complete in under an hour.
FINITO!!!


