Removing Wallpaper is something that anybody can can do. But what is the difference between hiring a pro and DIY? Is is worth the expense to hire a professional contractor to remove wallpaper? Here is a better look at the process so you can make a more informed decision.
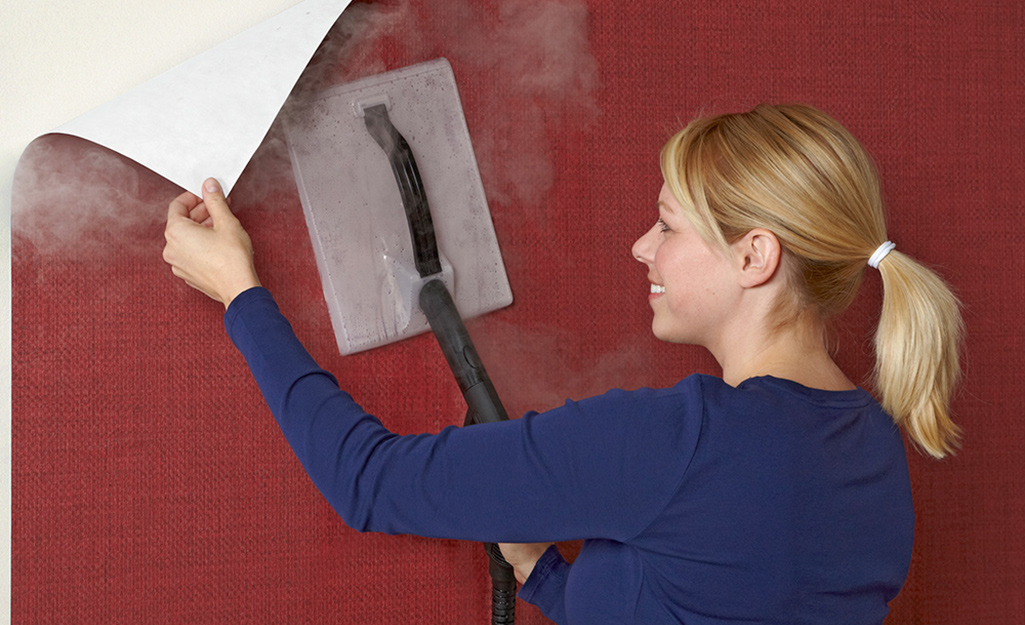
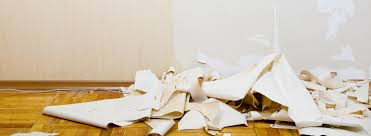
Step 1: Remove Wallpaper From the Wall. What could possibly go wrong?
It sounds pretty simple, but anyone who has ever attempted to remove wallpaper will know the process never goes as expected. There are a bunch of factors that affect how the paper comes down.
1) Were the walls properly prepared? Properly sized/primed walls release paper much more easily than an unprepared wall. Walls that were not prepared can result in major damage during the wallpaper removal process. The top layer of drywall can come off with the wallpaper, which can cause the need for a skim coat. Skim coating often takes as long, or longer than pulling the paper so avoid this at all costs.
2) What type of paste was used to put the wallpaper up? Good luck figuring this out. Even the most seasoned professional is still making an educated guess here. Cold water adhesive, textile adhesive with plastic, synthetic resin-based glue… it’s hard to keep up with all these. Breaking this bond is critical to the process, as is having a knowledge base with several different methods to try.
Unless you get incredibly lucky, removing the paste will take a handful of different tools and chemicals. Wallpaper scrapers, putty knives, sanders, paper tigers, DIF, vinegar, baking soda, fabric softener, and TSP are some of the most common. Trial and error are you friends here, and the more you practice, the quicker you will be able to solve the riddle of the mystery paste.
Step 2: Priming the walls.
This is actually the easiest and perhaps the only “gimme” step in the process. Of course, make sure the walls are completely dry before attempting to prime. Use of a fan, heater, and even a dehumidifier to help cut down the drying time. Opening windows also helps on sunny days with low humidity. The safest types of primers for homeowners to use are oil-based and shellac (alcohol-based) primers. Shellac-based primers are thinner and more brittle than oil, however, they also block more types paste and dry more quickly than oil. Additionally, both of these products smell horribly, but the stench of shellac dissipates within an hour or two. For these reasons, shellac-based primer is usually the better option.
Water-based priming options have come leaps and bounds in recent years (updated 1/2023), and can work just as good or better than solvent-based options. Both Roman Rx (Sherwin-Willimas) and Zinnser Gardz Problem Surface Sealer work wonderfully for almost all wallpaper-related applications. The only downside here is that these 2 products dry to a transparent/translucent finish, and may make it difficult for the inexperienced user to see where patching is required.
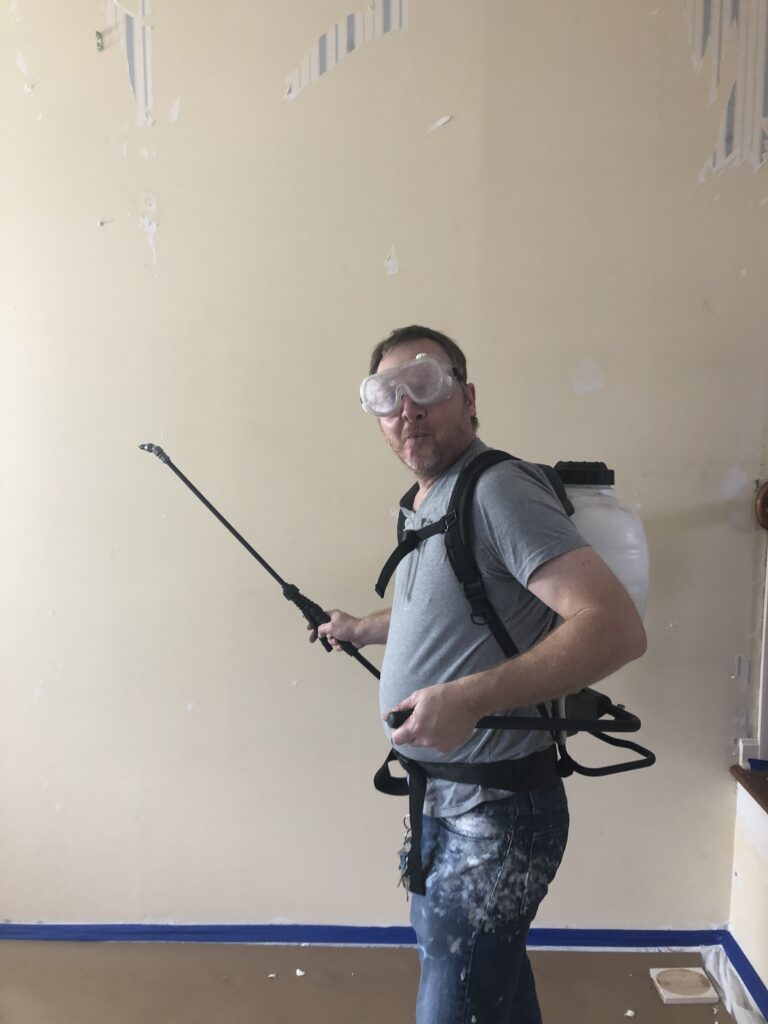
Step 3: Patching.
Another consideration with patching is, which product to choose. Shellac-based primer is a great base for relatively all type of spackle. Patching/spackle types include general purpose drywall compound, lightweight, elastomeric, and vinyl, to mention a few. Wall movement and load distribution are helpful in determining which is the best plan of attack. Everyone has a different method and preference for patching, and this is not a “one size fits all” type of fix. Practice and experience go a long way – as do trial and error.
Step 4: Sanding.
Sanding is critical in making a wall look good prior to painting. A well lit room is necessary for seeing all the texture divots left in patchwork after sanding. Identify divots and peaks, and then take appropriate measures to correct them. Fix peaks using sanding, and fix divots by filling them with spackle. Finally, re-prime any areas of patches so paint absorbs evenly across the entire wall.
Step 5: Congratulations, YOU ARE READY FOR PAINT! But don’t pat yourself on the back too hard before reading the pro tips below…
PRO TIPS AND TIME SAVERS FOR WALLPAPER REMOVAL:
- Mask floors off before attempting to remove wallpaper. Removing wallpaper makes a mess, one cannot cover too much of the floor/surrounding floors during this process. Wall paper removal is also very dusty. Use plastic to cover furniture and seal off the work area.
- “Have purpose” when pulling paper down. Taking one’s time can prevent destroying a wall while wallpaper is coming down. Remember, the less damage done while pulling the wallpaper, the less repair work later in the process.
- If wallpaper does not come down easily, this is a good place to stop and consult a pro and/or purchase/rent a steamer. Steamers are not a magic fix, as they can soften walls and make them easier to damage. Steamers are much safer on plaster than drywall for this reason. And remember, patching walls is often more costly than pulling paper.
PRO TIPS AND TIME SAVERS FOR WALLPAPER PASTE REMOVAL:
- Wallpaper paste removal is time consuming even for pros. Chemicals can help in this process – don’t be afraid to let chemicals sit and work their magic. DIF paste is thicker than concentrate and will stay wet longer. Grinding paste off the wall is also an option. Harmful chemicals are present in most types of wallpaper paste, so please remember to wear a full face respirator with filters if sanding. Festool makes a wonderful dustless sander/HEPA vacuum system that saves massive amounts of time with grinding. Ask your contractor if they have one, and look into renting one if you are going the DIY route. A sander hooked up to a regular shop vac pales in comparison to this specialized gear, but is also MUCH better than no vacuum at all.
- Some walls have more movement than others. An elastomeric, flexible patching material may work best for small cracks, in corners, and any other areas with movement. Vinyl spackle is a great patching material for plaster. Plaster walls are very common in houses built in the 1950s and before, and Camp Hill fits that category.
- Lighting is important for seeing paste as well as patching. Job site lights are helpful for identifying texture on walls. Shine a contractor lighting across a wall to see where any issues might be. Don’t forget that natural lighting is also a good indicator. The angle a light source is coming from affects where shadows will appear on walls. Recess lights close to a wall are typically the most challenging and least forgiving to work with.
PRO TIPS AND TIME SAVERS FOR PRIMING AND PAINTING WALLS AFTER WALLPAPER HAS BEEN REMOVED:
- Shellac-based primer solves more problems than any other primer when it comes to wallpaper removal. It dries fast, smells less, has good coverage, and sands easily. And most important, it blocks the most types of paste residue. This is an opinion based on 20 years of industry experience (and could vary from region to region, but is certainly true in the Camp Hill area).
- Use a 3/8″ nap roller for Shellac-based primer. The product is very thin and a smaller nap roller will hide texture best. Zinsser BIN Shellac is best in class for sealing walls after wallpaper removal. BIN can be found at Home Depot, Lowes, and most paint stores not called Sherwin Willimas.
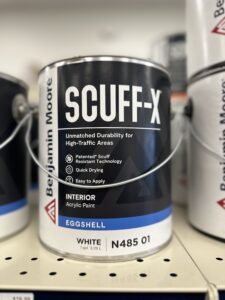
- Flat paint hides wall imperfections better than paint with sheen. Why is this important? Even the best contractor/finisher on the planet will leave imperfections on a wall where wallpaper has been removed. If you are looking for a durable, wipeable flat paint, check out Sherwin Willimas Emerald in flat. This paint is by far the best we have found when considering durability, look, and ease of application.
We hope you have enjoyed this blog about How to Remove Wallpaper in Camp Hill. Please feel free to reach out to us for estimates – and also if you are a DIYer and just have some questions we can answer in an email. We are happy to talk shop about all things painting even if you are planning to do a job yourself!
