Written by Curtis Tankersley of Just Add Paint in Mechanicsburg, PA
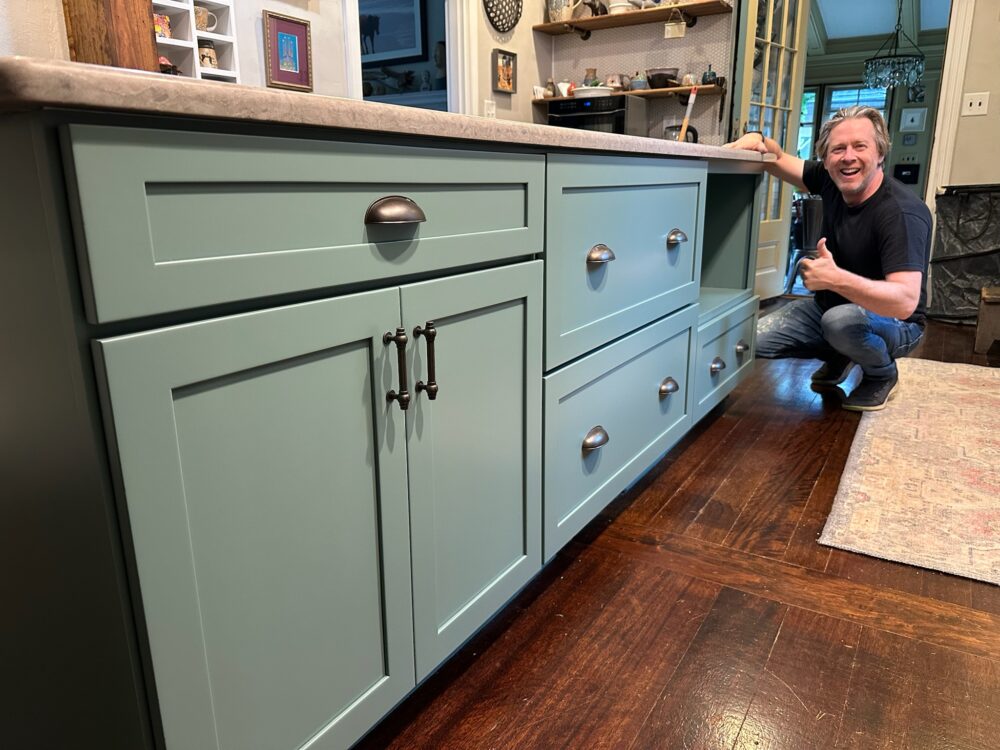
This project started the way all the best projects do—through a glowing referral from a happy customer. The journey started with a simple idea: update the kitchen island. Somewhere between the first Google search and the 20th trip to the paint aisle, things got complicated. Next came a dozen or so 11×14 paint sample sheets from samplize.com (look them up; we highly recommend them) plastered around the kitchen. But then came Sherwin-Williams Studio Blue-Green—rich, balanced, and precisely what they didn’t know they were looking for. During our walkthrough, it was the sample that my eye went to immediately as well. Decision made. This would be the perfect pop our 1800s farmhouse kitchen needed. Bold enough to make the island stand out, but refined enough to keep it from stealing the whole kitchen’s thunder. We couldn’t wait to get started…
A Quick Word About Professional Cabinet Refinishing
It’s labor-intensive. It’s detail-heavy. And it’s worth doing right. Most of our customers have done their homework and hire us because they want craftsmen who will get every detail correct. It takes expertise in masking, updated product knowledge, patience, and a knack for fine finishing.
A high-end paint sprayer helps. So does a lot of coffee. Now, here’s how it all came together.the process?
Day 1: The Great Uncluttering & Labeling
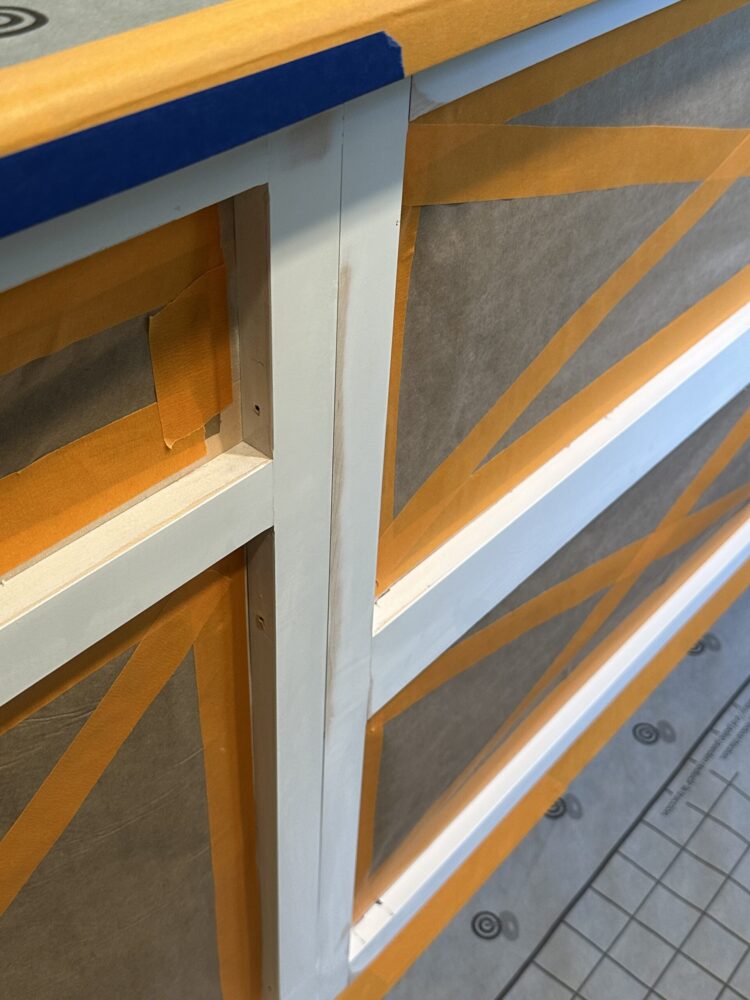
The team arrived ready to tackle chaos—and began by removing doors, drawers, and hardware. Yes, everything. If you’ve ever pried out 60 cabinet knobs and 20 drawer slides, you’ll know it’s like playing an extreme game of Operation—without the buzzer. But labeling everything? A lifesaver. Nothing says “professional” like having “Door A” ready to reconnect without accidentally turning your island into a puzzle. And of course, while all this is going on, we are masking the kitchen to protect ALL of the surfaces. Floor to ceiling, quite literally.
Day 2: Sanding and Priming—Because Prep Is Everything
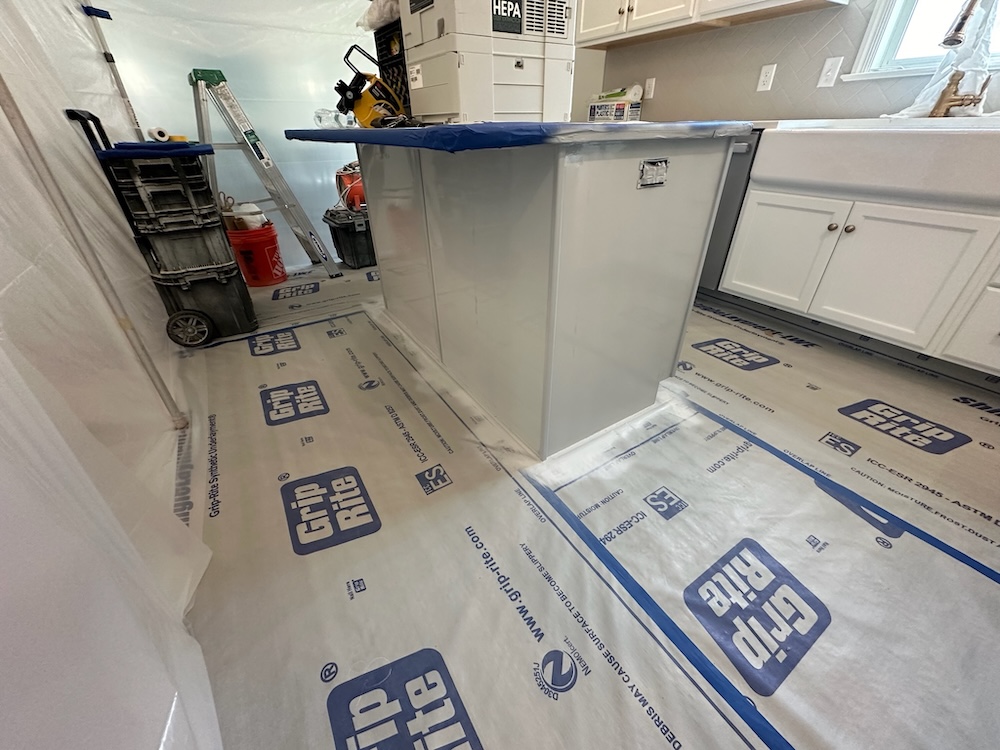
I believe that all cabinet refinishers have a love/hate relationship with building a spray booth. It feels great to have the expertise, but it is also quite tedious to assemble. After all, the painting is the fun part! But we are always relieved not to have to worry about errant paint spray landing on an appliance. Painter’s plastic is much less expensive to replace. With all the bits neatly tucked away, the crew cleaned, sanded, and vacuumed the surfaces—some of which were heavily chipped from a cheap factory coating.
Next up: primer. As Just Add Paint lays out, priming happens on day 2, and is then left to dry overnight. This is the unsung superhero step that ensures adhesion, uniformity, and longevity of your fabulous new shade. Yes, some of our competitors advertise that they do all their spraying in one day, so you can have your kitchen back faster. And yes, we think those kitchens are more prone to problems. After all, patience is a virtue. And better safe than sorry. And also, what a great excuse this is to eat out!
Day 3: Spray Day—Art Meets Performance
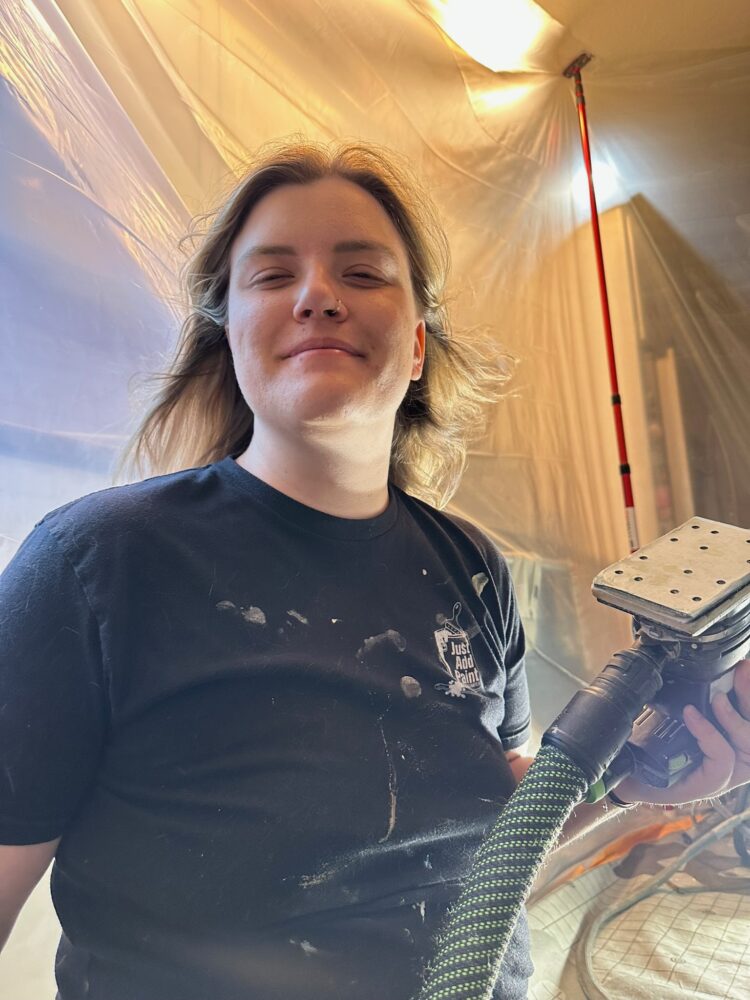
Day 3 is “spray day,” and it’s glorious. The team transforms into paint‑applying ninjas, wielding sprayers with precision, creating a surface that rivals factory quality—or better. How? Water-based 2k Poly. Basically, Solvent-ase lacquer on steroids without the joy of dangerous off-gassing. The result? A swift, smooth application of Studio Blue‑Green that would make Picasso question the inefficiency of his own paintbrush.
Day 4 (Maybe?): Touch-Ups, Tear Down, and a Glass of Wine
Although not always listed, real pros know you can’t skip the odds‑and‑ends touch‑up—where that one stubborn droplet or missed edge gets sorted. OCCASIONALLY, we walk in and find painting perfection. But this is rare, and there is usually at least one area for improvement. From there, it is a careful disassembly of the booth and masking, and then reinstalling doors and drawers. And yes, we are happy to change our hinges and hardware, it makes the job more fun! After all, you spent the money on refinishing, so small details like hardware should be exactly the way you want them. (Although on this job, the old hardware was literally perfect).
The Result: A Refined, Modern Statement Piece
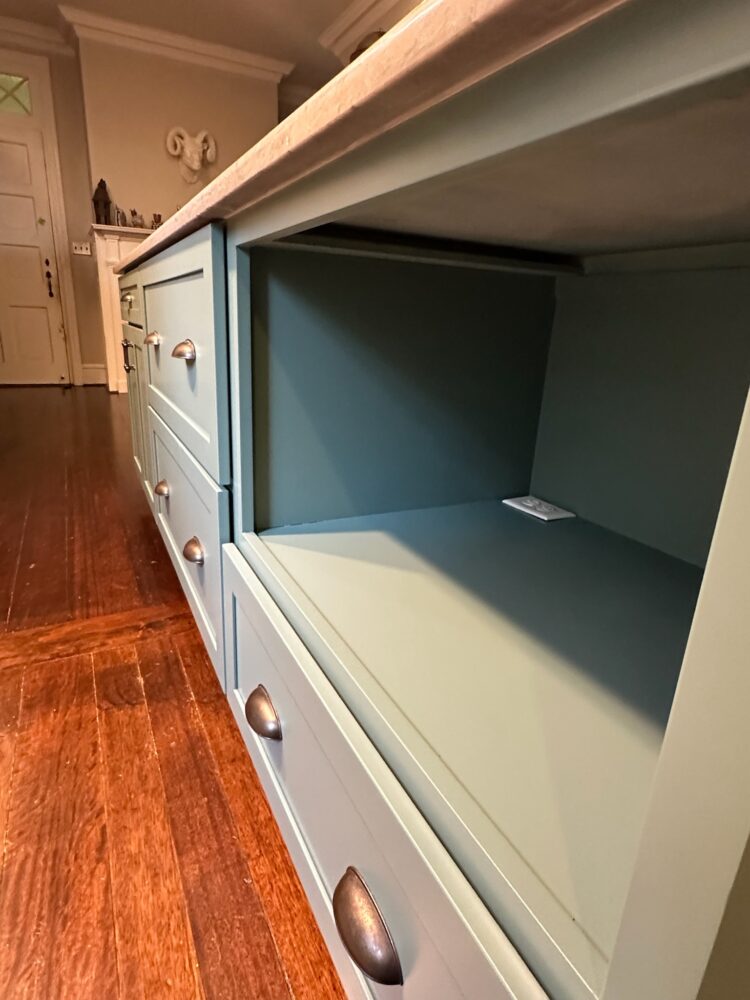
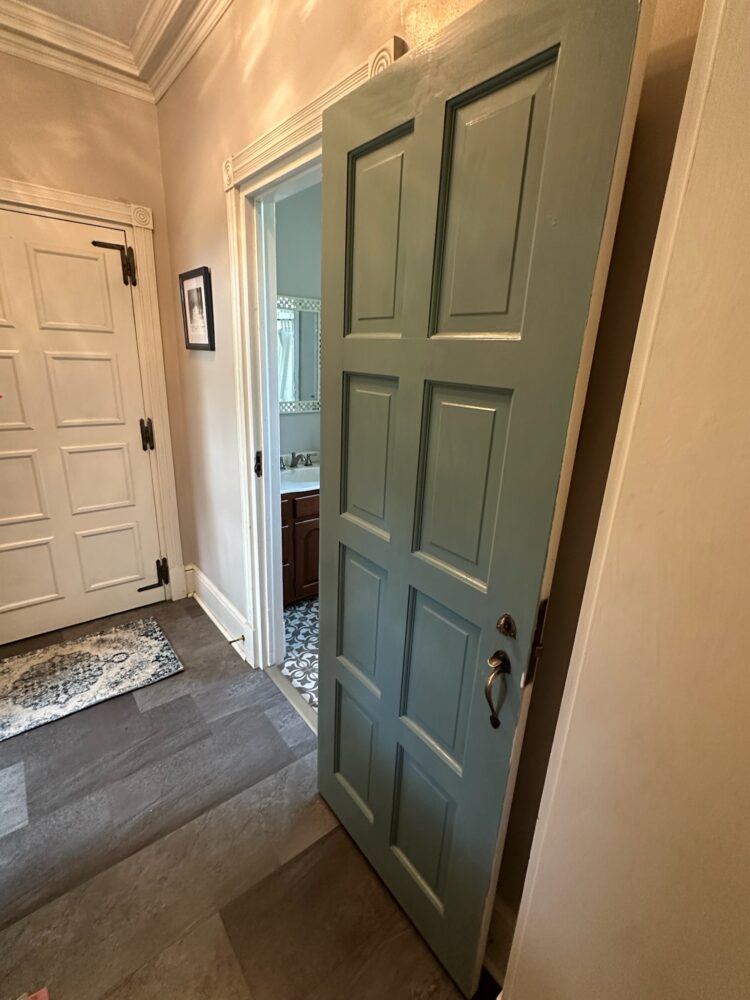
The transformation from plain factory white to Studio Blue-Green dramatically changed the feel of the kitchen. The color brings depth and sophistication, pairing well with a variety of countertop materials and flooring types. Its balance of blue and green tones offers both warmth and vibrancy, making it versatile for different kitchen styles—from traditional to contemporary. And in this case, our homeowner is an artist, and the island is an excellent complement to the artwork she has already created for her kitchen walls. We loved the color enough that we added it to our collection and will recommend it in the future.
The Value of a Professional Process
We love the idea of DIY for painting projects! However, cabinets are a different beast. A successful cabinet or island refinishing project is about more than just applying paint. The preparation, priming, and professional application techniques are what give the finish its durability and refined appearance. Following a proven process—like the one used by Just Add Paint—ensures the final result not only looks exceptional but will also stand up to daily use. KCMA-rated materials – in our case, by Envirolak and Milesi – are worth their weight in gold. Stick to Sherwin-Williams and Benjamin Moore for house paints, but look elsewhere for cabinet finishing products. https://grauerspaint.com/ for Envirolak, https://www.accessa.com/coatings/ for Milesi.
Added Bonus and Something to Think About…
The most frustrating part of cabinet refinishing is literally watching and waiting for the paint to dry. So don’t forget to mention any other small painting projects to your refinishers. They may have the tools to finish those projects, check them off your list, and appreciate the chance to keep making progress. We were able to knock out two doors with leftover paint at a deep discount in cost since we were already there with time to kill.
These Little Senior Dogs Had Nothing To Do With The Painting Process, But They Were Too Cute Not To Mention.


Thank you for reading our blog – “The Kitchen Island Makeover You Didn’t Know You Needed”, featuring an kitchen island refinished in Sherwin-Williams Studio Blue Green. Please feel free to reach out to us for estimates – and also if you are a DIYer and just have some questions we can answer in an email. We are happy to talk shop about all things painting, even if you are planning to do a job yourself!
Need help picking a color or planning your next painting project? Our on-staff color specialist Lexy is here to help! Contact us at JustAddPaint.net or call (717) 620-9205 — we’re here to make your walls wow.

Free Online Estimating for cabinets https://www.justaddpaint.net/contact-us
Interest in more information about top colors for cabinets? https://www.justaddpaint.net/top-5-goes-with-everything-kitchen-cabinet-painting-colors-2023
Key Takeaways
- The Kitchen Island Makeover began with a customer’s referral and the choice of Sherwin-Williams Studio Blue-Green paint.
- Professional cabinet refinishing involves meticulous preparation, sanding, and priming to ensure durability and a quality finish.
- The process included several days of work, from uncluttering and labeling to spray painting and touch-ups.
- The final transformation enhanced the kitchen’s aesthetic, making it a versatile focal point for various styles.
- DIY projects are fun, but experienced professionals ensure better results, especially with cabinet refinishing.


